Monday, April 17, 2017

Reader's Reach for the SKY!

The count down is on!!! How much longer until the end of your school year? 29 days here! Summer is so close I can TASTE it! Y'know that feeling in the halls at the end of the school year that's inevitable?! The "I really want summer..but we still have a couple weeks left" sort of feeling? Well, one way I find to deter the summer blues and to keep your students focused during the last few weeks is to fill your days with FUN and EXCITING activities! So...here it is...READING ROUNDUP!


This Toy Story inspired bulletin board craft is one that my kids were STOKED to complete! Our school hosts a Family Reading Night each year. This year's theme was Cowboy/Western! One way to excite students and encourage them to attend is by creating a FUN and colorful bulletin board in anticipation of the event. I decided to go with a Toy Story-esque bulletin board and I quickly realized that my students were in LOVE with this craftivity!

So, before copying and gathering the supplies needed for the art project, I decided to get a little creative with the bulletin board background, lettering, and borders. I was looking for a way to include clouds...like the clouds found on the wallpaper in Andy's room from the Toy Story movie. I found the cloud bulletin paper at Hobby Lobby with a 40% off coupon for 5 bucks (SCORE!) Both bulletin board borders I ordered on Amazon (the red looks like a cowboy kerchief...adorable!) Next, I wanted a way to channel the movie through the lettering. I googled an image of the movie cover and used similar font and colors to write the title of my bulletin board. I printed the letters on white card-stock, cut them out and laminated them for durability. I was SO impressed with how the letters turned out...and you can't beat the price! ;) Interested in using my letters? Grab them for FREE here!

After finishing the background we were ready to get started on the art projects. Check out the picture below for the finished product of each craft! Here are the supplies you will need for this project:

  • Colored construction paper (skin colored, brown, red, orange, yellow, & blue)
  • Scissors
  • Glue sticks


First, I had my students write about their current favorite books and sketch a picture in the lasso portion of the Reading Roundup page. Next, I had my students cut out the specific templates and step by step showed them how to assemble the pieces. Last, we glued our Reading Roundup page to the hands of our cowboys and cowgirls! Check out my Reading Roundup craftivity here at my TPT store!

Tuesday, January 10, 2017

Peter Brown...Children's Author Extraordinaire!

So, the Common Core is all about comparing and contrasting story elements between stories...especially stories written by the same author. What better way to study these standards than through a FUN and EXCITING author study?!

Please tell me you've heard of Peter Brown?! It wasn't until last year that I was introduced to his books after reading "You Will Be My Friend" (ADORABLE!)....and from that point forward I fell in LOVE! I knew right away that I wanted to include his stories in my teaching, because if I loved him THAT much than my students would surely fall for him too!


In reader's workshop we were focused on determining the theme of a story. Conversations in my 3rd grade class before our author study consisted of discussions like how to use evidence to support our thinking of a story's theme, and how a story's theme is DIFFERENT than a story's lesson. Yada-yada-yada! In short we added a lot of information about story theme to our schema and had many experiences with determining story theme before this lesson.

I decided to use the Peter Brown books listed above--all pieces of children's literature with clear themes. Chowder is the story of a unique and one-of-a-kind dog who struggles to make friends with other animals until realizing that being his quirky self is the one sure-fire way to make the most friends! The Flight of the Dodo is a tale of flightless birds that but their heads together to invent a device that allows them to finally fly. After building and making all of their dreams come true--including bird-doo missiles--the Waddlers second guess their inability to fly high in the sky and wonder if the ground is a better place for them to live. The Secret Garden is a sweet, green story that follows a little boy's determination to turn a dull and dark city into a colorful and bright place to live. I brainstormed some possible themes before sharing these stories with my class. Here are some of my ideas:

Chowder

  • Friendship
  • Courage
  • Individuality (be yourself)
  • Acceptance
The Flight of the Dodo

  • Teamwork
  • Friendship
  • Bravery
The Secret Garden
  • Hard work
  • Perseverance  
  • Kindness
Then, I spent 1 day reading each story. After reading, we brainstormed themes that would match each story and provided evidence for our thinking. We filled in our graphic organizer, that we first glued into our reading response journal. After 3 days of reading and writing we compared and contrasted each theme from every Peter Brown story, looking for consistencies and patterns in his writing. My littles were beyond engaged with these books...and begged for more Peter Brown books after we finished studying his literature. 

 
Interested in completing this activity in your classroom? Click here to download my FREE making inferences graphic organizer. I have NO doubt that your students will beyond love all that Peter Brown has to offer...HAPPY READING! :)

Thursday, January 5, 2017

Setting Goals for the New Year!

I LOVE the start of the New Year! Although coming back to school from break can be rough, it allows a fresh new start full of possibilities for both students and teachers! :)

After Winter Break I like to ease back into our classroom routines...so what better way than with a fun craft-ivity?! This craft encourages students to reflect on the past year and create new goals for the new year!

Here is my sample:

I like to encourage students to come up with all sorts of new goals--academic and social emotional included! Together, we discuss what makes an attainable, realistic goal and brainstorm ideas for student goals.

I added some cute additions to this craft by using some materials I had on hand and others I picked up at Dollar Tree. For this craft-ivity you will need:
  •  Colored construction paper
  • Blow Horns (found at Dollar Tree)
  • Sparkle pom poms (optional)
  • Hair color yarn


My kiddos had a blast putting together their faces and creating 4 new goals for the new year. I had my kiddos use runny glue to attach their hair to back of their party hats. Then, I used hot glue to add the blow horn and sparkle pom pom to the top of the hat!

Just a cautionary word: Your students WILL ask to blow their blow horns. So, for fun, I let everyone blow them for 5 seconds...no more, no less! :)

Here are samples of student work...they turned out A-dorable!!! Interested in this New Year craft-ivity? Check it out in my TPT store here! :)


Wednesday, December 7, 2016

Math PEN PALS!

Are your students BEGGING for pen pals?? Since the start of the year I've had SO many students come ask..."Mrs. Ippy, uh, can we have pen pals this year?" Unfortunately between the assessing we teachers are doing and the content we must cover pen pals tend to fall low on the list of priorities.

HOWEVER, speaking of testing...I was doing some reflecting on the state standardized assessment our state requires for the 3rd grade. Many practice questions from the math portion of that test required our littles to read a story problem, read a fictional student's thought process, then analyze whether or not the fictional student was correct. WOWZA! That's a lot for a 9 year old! So, to get in the practice of this business I thought up a crazy idea that would kill 2 birds with one stone...that is, the math error analysis & having pen pals! ;) 

The idea is math pen pals!! I talked to my teaching buddy across the hall and ran it by her first. The idea is that my students will read a 2-step story problem, and solve using the 5 step formula we've been practicing. Then, my students will write a constructed math response explaining their thinking. (See my anchor chart regarding a math constructed response below!) While my students are busy solving during our math workshop, her kiddos are doing the same, except with a completely different 2-step story problem. After our students both solve and write their responses, we switch papers.   


I copy these pages double sided so that the original students' thinking is not lost. My class will read the story problem and the original student's thinking. Then, they will flip the page over, solve on their own and write a letter to their pen pal explaining whether or not they agree with the first students' thinking! 

I am SO excited to give this a whirl! My class and my friend's class have both responded to the first story problem...can't wait for them to read and respond to their peers. I know that this isn't the traditional pen pals my students were hoping for...but hey, teachers make it work! 

I am thinking about making bundled sets of these, because, really, this whole pen pal concept could be used with ANY math content (not just 2 step story problems). My plan is to eventually add it to my "writing about math" component of my math workshop.

Interested in trying this out in your own classroom? Check out my FREE sample here! :)


Would you be interested in a resource like this?! Please..any feedback is appreciated!!

Sunday, December 4, 2016

Let it Snow, Let it Snow, Let it Snow...

It's that time of year yet again! Snow is falling, lesson plans are calling...and Christmas break is almost here! I wanted to create a FUN winter art project that still included math practice. So, after much thought I came up with my CUTIE PENGUINS!


 This craft-ivity is a great one, not only because your kiddos will be thrilled to create their own arctic penguins but also because the math piece can be differentiated to meet the needs of your students. In 3rd grade, we used multiplication and division number sentences to show fact families, however, addition and subtraction would work well for younger learners as well!

Here are some things you should know if you're looking to pursue this craft. You will need the following supplies to make it happen:

  • Colored construction paper
  • Scrapbook paper
  • Glittery pipe-cleaners
  • Hot glue gun & glue sticks
  • Clear Glitter (optional)
  • Spray adhesive (optional)
So, after printing and copying the penguin templates on coordinating colors I made a stop at Hobby Lobby to pick up the rest of my supplies. I had fun picking out cute paper to use for the penguin scarves! I also made sure to pick up glittery pipe cleaners, clear glitter, and spray adhesive for a super snowy touch!

Once we finished cutting out, assembling, and gluing our penguins together it was time to add the pipe cleaners. I dropped a glob of hot glue on the back of each ear muff and held the glittery pipe cleaner there until the glue had dried. I had pre-cut pages of teal construction paper, so next we added our penguins and fact family page to each teal sheet. Then, to make our snowy penguins REALLY come to life I sprayed each sheet with the Elmer's spray adhesive (I LOVE THIS SPRAY GLUE!!) and sprinkled clear glitter on top to give the illusion of snow falling. 


 The penguins turned out ADORABLE! My kiddos truly had a blast creating their arctic penguins. In fact, the craft was so much fun that they blew right through the math part of this project! I added some letters to my bulletin board that read: "Fact Families are Snow Much Fun!" While at Hobby Lobby I picked up some colorful and cute wrapping paper that became my bulletin board paper and some lime green garland that I stapled around the whole bulletin board. Finally, I swung by the dollar store to pick up some glittery snow flakes to add here and there. Unfortunately I wasn't able to get a full picture of my bulletin board (the tiny hallway really hinders my photography skills!) But here it is:

 
Click here to find my penguin fact family winter bulletin board art project in my TPT store. Also, find my bulletin board letters here for FREE! I simply printed on white card stock, cut out, and laminated for durability!

Sunday, November 27, 2016

Figuring out Fractured Fairytales!

Maybe it was my successful observation last week, maybe it was the sweet notes I found on my desk to remind me why I LOVE my job, perhaps it was the 3 cups of coffee I just finished drinking...but boy, oh boy...am I FIRED UP about fractured fairy tales!!! Fairy tales for a lot of my students are uncharted water. I was blown away at exactly how many of my kiddos weren't sure what constitutes a fairy tale. So, I decided to back it up and get back to the basics!

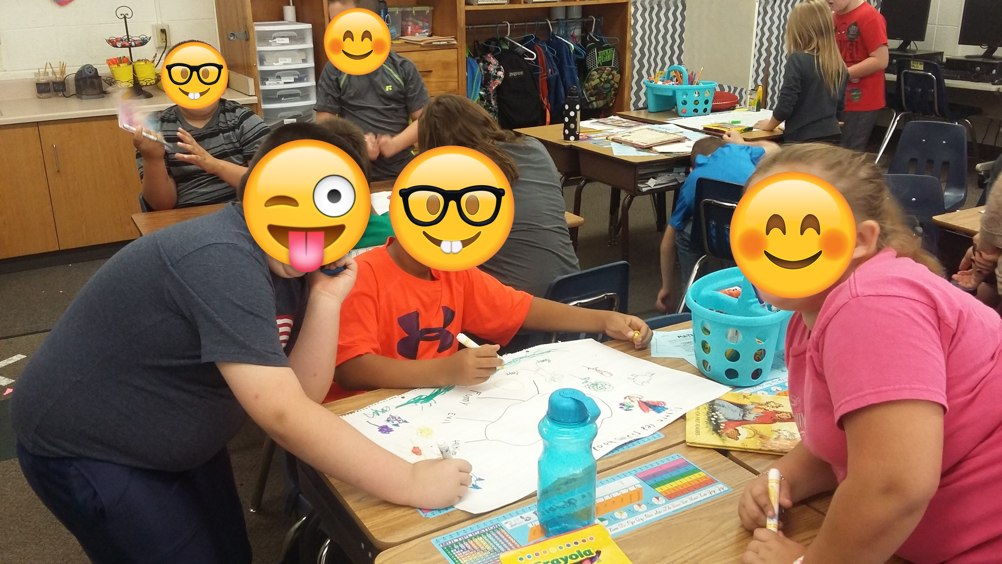
To kick off our fractured fairy tale unit, I had my students work in their tables reading a classic fairy tale together (some of the fairy tales I used lean more towards the way of folk tales). After having each group read the fairy tale together I had each table create a poster that showcased the story elements in their specific story. Here are a few snaps from the FUN!


Sooo...after I began checking in on my groups I had one of those teacher moments...y'know those moments when you realize..."OH...I completely over estimated my students' schema, ability, and experience with said topic..." I could not believe how many of my kiddos were confused by "story elements" ...many had not a clue what I was looking for! Even when prompted with words like, setting or plot I was greeted with many blank stares. So, as my wheels began turning we enjoyed sharing our creative posters!

That night I went home and whipped up a quick fairy tale power-point that took a closer look at the specific story elements I was searching for the day before. A sense of relief started pouring over as little light bulbs across my classroom flickered on! PHEW! Check out my power-point here!

OH...did I mention how our grade level's reading and writing units are currently 100% aligned?! So, while we're studying fairy tales in reader's workshop as part of a traditional literature unit, we're also writing adaptations, or fractured fairy tales for classics in writer's workshop! Okay...I'm clearly WAY excited about the alignment...but we all know that this doesn't always happen across content areas.

What better way to study story elements and practice writing adaptations for classic fairy tales than through a fractured fairy tale study?! I would spend a day reading and studying an original fairy tale, followed by a day reading and studying the fractured fairy tale, while comparing and contrasting the two versions (a HUGE 3rd grade standard). My absolute FAVORITE fairy tale and adaptation study was comparing and contrasting The Three Billy Goats Gruff with The Three Silly Billies.


Okay...can I just quickly say how UNDERRATED Margie Palatini is?! Love LOVE her hysterical books! We had so much fun comparing and contrasting the similarities and differences between these two tales. I created two graphic organizers that I had my students glue in their response journals. These pages definitely helped organize our thinking as we studied the two versions. Grab and enjoy them for FREE here! 


We are still studying fairy tales and we've begun writing our very own fractured fairy tales. Stay tuned for my fractured fairy tale literacy unit complete with resources for both reading and writing! :) Do you study fairy tales and fractured fairy tales?? I would love to hear more ideas!

Sunday, October 16, 2016

Ghosts, Ghouls, & Goblins...OH MY! A Halloween Classroom Party Adventure!

Trying to keep calm during this HALLOWEEN MADNESS?! Yes, I know! The struggle is all too real! On top of being an educator and mentor, during the holiday season teachers feel the added pressure of party planner! Staying organized during this time has proven difficult for me in years past. This year I've decided to be pro-active! I always send a Halloween Party note home each year, asking for parent volunteers to help plan and organize our party as well as supply donations. I whipped up these parent remind slips for our Halloween party. Included in this FREEBIE are two parent notes -- one for parent volunteers and another for party donations. These slips will help me keep organized this year, as the flurry of party notes come in and my hair--piece by piece--begins to turn gray! :) HAHA! Only kidding! Check out my sample below!

Click here to download my Halloween Classroom Party Parent Reminders!


What does your district do in celebration of Halloween? Our school always has a parade, followed by a classroom party. The parade is GREAT! The kiddos get to show off their proud and spooky costumes! We end the day with a classroom party. Because I'm a HUGE fan of the Daily 5 in reading, I model my classroom parties after the rotations we use in my reading block. With the help of parent volunteers I split my classroom into thirds and have each group rotate through 3 stations: A snack station, a craft station, and finally, a game station!

The last few years I've had my kiddos MAKE a fun, themed Halloween snack. I found the idea here at this party and food blog...shout out to Party Pinching Blog! As soon as I found the idea I couldn't wait to try it out! For the snack you need:

  • Ghost Peeps (1 for each student)
  • Chocolate pudding cups (1 for each student)
  • Package of Oreos, crumbled
  • Pumpkin candies
  • Spoons
BOOM! Here is the ghostly treat! A-dorable!


For my craft I gather a ton of Q-tips and cut about half of them in half. Then, I print off skeleton skulls. I have my kiddos build a skeleton of their very own using the Q-tips and runny glue. I pick fun Halloween colors for my students to glue their skeletons on (lime green, purple, orange, black). They have a BALL positioning their skeleton and bones in different positions!

Finally, my game station is a simple BINGO game, using candy corn as game pieces. I also have students guess the number of m&m's in a mason jar. I'm always looking for new, FUN games that are easy for kids and budget friendly. Comment with your Halloween Classroom Party ideas below! :) Can't wait to hear all about your successes.

Sunday, October 2, 2016

WHOOO loves to read? Another seasonal bulletin board craft!

Just in time for our school's Fall Open House, I put together my CUTEST fall bulletin board yet! This owl-inspired craft was a FAN FAVORITE by my students! We had so much fun cutting and gluing our owls together. Not to mention, it was wonderful to read all of my students' favorite books so far this school year!


You can find this owl-inspired craft in my TPT store, but you'll also need a few other materials if you wish to recreate this craft. I stopped by Hobby Lobby--my go to store--to pick up a few of the supplies.

You will need:

  • Brown paper lunch bags (1 for each student in your classroom)
  • White cupcake liners (2 for each student in your classroom)
  • Feathers...I picked up two packs and had more than enough
  • Hot glue gun and sticks
  • Fall colored card stock...Hobby Lobby had a GREAT deal on a fall colored paper pack!
Once you pick up your supplies you're ready to get crafting! I split up this craft into 3 days...we worked about 15 minutes at a time to put our owls together. I had my kiddos cut out all of the owl body templates. Then, I showed them step by step where to glue each body part on the brown paper bag (I also trimmed the ends of the bags so they would fit better on the card stock). The trickiest part for them was positioning the wings on the side of the body. I also modeled several times how to glue the black eyes inside the cupcake liners and the cupcake liners onto the brown paper bag.


Then, we wrote about our favorite books and illustrated the book covers using the writing template. Last, I had the kids glue their writing templates at the bottom of the colored cardstock. After my 3rd graders turned their colored cardstock and owls in, I was able to hot glue the owl bodies and add a couple of cute feathers on the top of the head. ADORABLE! I love how these little critters turned out. My students were so proud of their owls they asked if they could take them home that afternoon! Can't wait to think up my next winter-themed bulletin board craft! :)

   
I have a free version of my "My Favorite Book" template pictured in this fall craft. This download is available for those who also feel the need to tie any and all art projects back to the curriculum! Click here to download the freebie to use with ANY craft or project! :)

Sunday, August 28, 2016

Back to School! ...What do you want to BEE?

So, back to school has arrived! As usual, it's never easy to get back into the swing of things...both for my students and of course, myself! As with many of us teachers, I love to change my back to school theme each year! I was so excited to put together a fun, back to school BEE themed bulletin board!

Over the summer I was on a mission to collect cardboard egg cartons for this project. I was very adamant about bugging family and my hubby was even able to score a few cartons from his co-workers at work! I started by covering my bulletin board with craft paper. Amazon has a great variety of bulletin board borders and for much cheaper than our local teacher store...I picked up the black and white chalk border here and the yellow scalloped border was left over from another bright and cheery project! :)

I pinned up the egg cartons with tacks...I tried stapling the cartons first and that was a complete disaster! Haha! Pretty sure I broke a sweat trying to maneuver my stapler at the perfect angle to get the cartons to stick. :P I stapled some brown butcher paper around the cartons to act as a bee hive.

I was pretty impressed with my bee-hive building skills after all was said and done! My kiddos thought the hive was the bees knees! On the first day of school, after discussing our hopes and dreams for the school year I asked each 3rd grader to think about what they wanted to "bee" when they grow up. While my students worked I was able to buzz around the room and check out their aspirations for the future. It was such a fun, get to know you/back to school craft-ivity that really helped me learn much more about my students than I ever expected!
If you're interested in my bee craft you can find it in here in my TPT store! I would so love to hear about everybody's FUN back to school activities! :)

Wednesday, July 13, 2016

Data, Data, Data!

So, one aspect of teaching that's FOREVER changing is the way that we teachers collect data in the classroom. It seems like the expectations put on teachers each year grows and grows. Our to-do list is forever long! The last couple of years I've tried multiple different strategies to collect reading/literacy data in my classroom. I've found one method that truly works for me!


Each year I start by digging out my trusty 3 ring binder. I bought numbered tabs from Staples to keep my data organized. I assign my kiddos numbers at the start of the year...so each number corresponds to one student in my classroom.


Behind each numbered tab I keep copies of reading and comprehension assessments, writing samples, or any other piece that will be useful during conferences. I then copy 3 of my reading data sheets (one  sheet each for the Fall, Winter, and Spring). I use these sheets during independent conferences. The post-it note section is where I keep sticky notes from guided reading, book clubs, or whole group observations.


 At our school we use the Fountas and Pinnell BAS reading assessment to determine reading level in students. For this reason part of our school-wide reading assessment includes keeping record of each student's independent reading level (what they can read and comprehend on their own) as well as their instructional reading level (what they can read and comprehend with the help of their teacher). So, I went ahead and included a reading scale for reference. I've also listed some independent reading behaviors that are expectations during my reader's workshop. Together, I talk with each student about the reading behaviors and whether they showing those behaviors during reader's workshop. At the top of this data collection tool I've listed some reading skills as strengths and goals. I highlight these objectives while listening to students read.


I've used this tool for the last 3 years and have found that it is great to reference during parent/teacher conferences as well as at problem solving meetings. I would LOVE to hear about the data collection tools you use in your classroom! Comment and share your ideas below! If you'd like a copy of this data tool to use in your classroom click here to download the pdf or click the data collection tool above! ENJOY! :)


Monday, July 4, 2016

Student Centered Reading Binders

Okay...so this summer one of my many goals has been to create a reading binder that fits my reader's workshop block like a glove! & I think I've done just that! Each year my kiddos bring a 3 ring binder to start the school year and I've found that I am often rushing to throw things together that we may or may not use throughout the year! I wanted a solid resource that was student centered...so BEHOLD, my reading binder was born!


So, I started by creating a SUPER cute binder cover that each student can decorate and make their own. As you can see, I chose to go with a little rainbow action! My reading binder has 5 literacy tabs, color coded that are just peeking out of the side of the binder. This was intended to help with easy use and organization for my kiddos. I went ahead and printed the binder tabs on card stock for durability, cut the circles out and glued them to each cover page.

The first tab of my reading binder is entitled "read to self." During my reading block this is where students are reading independently from books chosen from their book bins. This tab has several different tools that students may use during the school year. The first is a reading stamina bar graph. This is an activity that I do at the beginning of the year, where, as a class, we graph how long we can all read independently during read to self. This graph is a HUGE motivator for students. The rules are everyone MUST be in their reading spot, MUST be focused, and MUST be really reading. The kids love to watch the bars grow. The second is a rating system that students use to grade their reading behavior each day for read to self. You will see a calendar for each month. The rubric is below...a 4 means EXCELLENT reading behavior, while a 1 is could be better. The last part of this tab includes a "flag your thinking" reading strategy used in my classroom. Students use sticky notes and symbols to track their thinking as they read independently. The students really love this tool!

The second tab is called "My Reading Progress". This tab includes reading data collected by the students throughout the year. It includes a reading log and a reading goal page. Again, the goal page has a rubric for students to choose from. This will make a GREAT tool for one-on-one conferences!

Third, is a tab titled "My Mini Lessons". Do you find that you copy really awesome anchor charts for students to reference and then find those very charts in the recycle bin the next day? AH! This tab gives a home to all of those useful charts that you encourage students to reference during the year. I created a mini lesson handout table of contents.

This is perhaps my favorite section of the reading binder!! Behind the "Working with Words" tab is a student dictionary for letters A - Z. Each letter page has Dolch sight words for grades PreK- 3rd. The lines on each letter page allow students to add words throughout the year. My plan is to have students add spelling and sight words to this section weekly.

So, the last section is a tab reserved for reading groups. I've called it "Reading Groups and Book Clubs". I know, first hand, how different every teacher's reading block looks. For this reason I've only included a story review and map that can accompany any book. This year I am excited to try out book clubs, but wanted to keep a tab for guided reading...in case I experience any epic fails! :)

That pretty much sums up my new reading binder. I am SO excited to give this a try this year! I think my students are really going to enjoy the freedom that this binder offers. You can find this reading binder at my TPT store! I would love to hear about what others use for their reading and literacy binders...comment below!!

Monday, November 17, 2014

Don't Let Pigeon Eat the Pumpkin Pie!

Are your students as into the Pigeon books as my third graders?! If so they will love, LOVE the fall-inspired Pigeon craft I created and used in my classroom. First, I started by reading Don't Let Pigeon Ride the Bus, by Mo Willems. As a class we brainstormed ideas related to fall and autumn.

Our list included:


  • Playing in/raking leaves
  • Hunting
  • Carving pumpkins
  • Spending time with family
  • A Thanksgiving feast
  • Wearing warm clothes
Then, I encouraged my students to relate these fall-esque ideas to Pigeon. I shared with them my example...Don't Let Pigeon Eat the Pumpkin Pie.
I asked that students write on their "Don't Let Pigeon" half sheets before starting on their craft. Here are some of the ideas they came up with. 


I put all of the little cuties on the bulletin board outside of our classroom....and VOILA! Fall craft complete! 
Find this NEWLY UPDATED craft  in my TPT store! :)


Tuesday, November 11, 2014

That's just the way the Cookie Crumbles

How do you manage student behavior? Something new I've started this year, called smart cookies, really has my students motivated! I've created a document with a smart cookie template. Once I've printed the document I'll copy the page on multi-colored paper from Staples and cut out the cookies individually. They end up looking like this...

At  the beginning of the school year I gave these out like crazy for coming into the classroom quietly, quickly showing me that they were ready to learn, etc. I award them for many different reasons. When students earn a smart cookie they know to put their name on the back of the paper.
They then put them into the massive cookie jar! On Friday afternoon I pull anywhere from 10 to 12 cookies from the jar. The students' names that are pulled will get a piece of candy. See the gold smart cookie pictured above? I award the golden smart cookies for EXCELLENT behavior! In the case that I pull a golden smart cookie at the end of the week that student has the opportunity to pull from a prize box (filled with dollar store goodies..oooh yah!)

This approach to behavior management works well for my students! Because I don't always pull everyone's name from the jar I also have a 20 - 30 minute block of time set aside at the end of the day on Friday called "Fun Friday." This allows the well behaved kids a reward despite not being pulled from the cookie jar.

If you're interested in using this idea you can find it for free here. If you choose to use it please share your experiences and comment below!! Thanks!! :)